Introduction
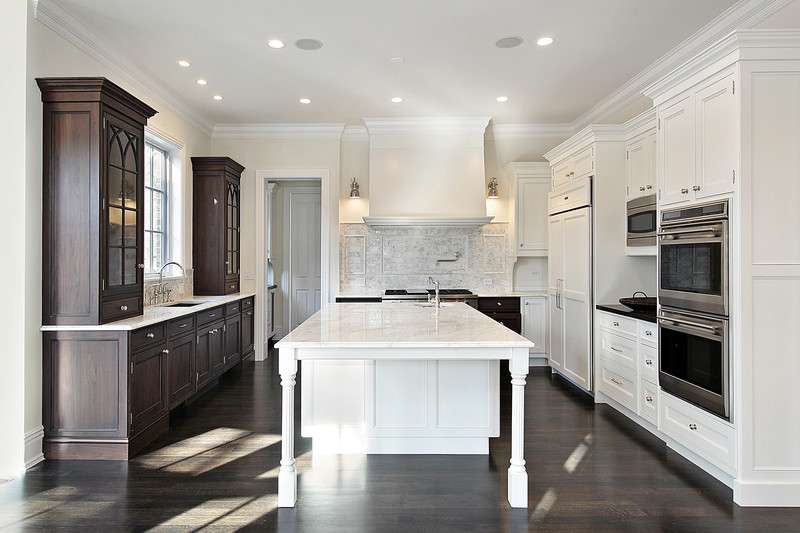
Are you dreaming of transforming your concrete floor into a warm, inviting hardwood masterpiece? You’re in luck! Installing hardwood flooring over concrete is not only possible but can also add significant value and beauty to your home. In this comprehensive guide, we’ll walk you through the process, sharing expert tips and tricks to ensure your project is a resounding success. So, roll up your sleeves, and let’s dive into the world of hardwood flooring installation!
Preparing the Concrete Subfloor
Before we even think about laying down that gorgeous hardwood, we need to make sure our concrete subfloor is up to snuff. Think of it as preparing a canvas before painting a masterpiece – it’s crucial for a flawless finish.
Moisture Testing
First things first: moisture is the enemy of hardwood flooring. You wouldn’t want to build a sandcastle at high tide, would you? Similarly, you need to ensure your concrete isn’t harboring excess moisture. Conduct a moisture test using either a calcium chloride test or a relative humidity test. The ideal moisture content should be below 3 pounds per 1,000 square feet over 24 hours.
Now, let’s give that concrete a spa day! Sweep, vacuum, and scrub the surface to remove any dirt, dust, or debris. If you spot any cracks or chips, patch them up with a concrete repair compound. Think of it as healing your floor’s battle scars – it deserves some TLC!
Leveling the Surface
A level surface is crucial for a beautiful hardwood floor. Use a long level or straight edge to check for any high or low spots. If you find any, use a self-leveling compound to even things out. It’s like ironing out the wrinkles in your favorite shirt – smoothness is key!
Choosing the Right Hardwood Flooring
Selecting the perfect hardwood flooring is like choosing a life partner – it’s a long-term commitment, so you want to get it right!
Engineered vs. Solid Hardwood
When it comes to installing over concrete, engineered hardwood is often the go-to choice. It’s like the superhero of hardwood flooring – more stable and resistant to moisture than its solid wood counterpart. However, if your heart is set on solid hardwood, don’t despair! It’s still possible with proper preparation and installation methods.
Wood Species Considerations
From oak to maple, cherry to walnut – the world of hardwood species is vast and varied. Consider factors like durability, color, grain pattern, and of course, your personal style. It’s like choosing the perfect outfit – you want something that looks great and suits your lifestyle.
Installation Methods
Now that we’ve laid the groundwork (pun intended), let’s explore our installation options.
Glue-Down Method
This method involves adhering the hardwood directly to the concrete using a strong adhesive. It’s like giving your floor a permanent hug – creating a solid, stable surface. This method is excellent for areas with heavy foot traffic or where you want to minimize noise.
Floating Floor Method
With this technique, the hardwood planks interlock with each other and “float” above the subfloor. It’s like a jigsaw puzzle that comes together to create a beautiful picture. This method is often quicker and easier, making it a favorite among DIY enthusiasts.
Essential Tools and Materials
Before we roll up our sleeves and get to work, let’s make sure we have all our ducks in a row. Here’s a list of tools and materials you’ll need:
- Moisture barrier
- Underlayment
- Hardwood flooring
- Adhesive (for glue-down method)
- Trowel
- Saw (circular or table saw)
- Measuring tape
- Spacers
- Hammer and tapping block
- Pull bar
- Knee pads (trust me, your knees will thank you!)
Step-by-Step Installation Process
Installing a Moisture Barrier
First, roll out your moisture barrier over the concrete. This is like giving your floor a raincoat – it protects against any moisture that might try to sneak up from the concrete.
Laying the Underlayment
Next, install your underlayment. This acts as a cushion between the concrete and your hardwood, providing comfort underfoot and helping with sound insulation. It’s like giving your floor a cozy blanket!
Installing the First Row
Start with the longest, straightest wall in the room. Place spacers against the wall to allow for expansion, and begin laying your first row of planks. This first row is crucial – it’s like setting the foundation for a house, so take your time to ensure it’s straight and secure.
Continuing the Installation
Work your way across the room, row by row. If you’re using the glue-down method, apply adhesive in small sections as you go. For a floating floor, make sure each plank clicks securely into place. It’s like piecing together a beautiful wooden puzzle!
Finishing Touches
Once you’ve covered the entire floor, remove the spacers and install baseboards or quarter-round molding to cover the expansion gaps. These final touches are like putting the cherry on top of a sundae – they complete the look and give your floor a polished finish.
Tips for Success
- Acclimate your hardwood to the room’s conditions for at least 72 hours before installation.
- Work with multiple boxes of flooring to ensure a mix of shades and grain patterns.
- Stagger the end joints of the planks for a more natural look.
- Use a tapping block to protect the edges of the planks when fitting them together.
- Take your time – rushing can lead to mistakes that are difficult to fix later.
Common Challenges and Solutions
Even the best-laid plans can hit a snag. Here are some common issues you might encounter and how to tackle them:
- Uneven subfloor: Use a self-leveling compound to create a smooth surface.
- High moisture levels: Install a high-quality moisture barrier or consider using luxury vinyl plank as an alternative.
- Tight spaces: Invest in a jamb saw for cutting door frames and moldings for a perfect fit.
- Squeaky floors: Ensure the subfloor is secure and use construction adhesive in problem areas.
Maintenance and Care
Congratulations! You’ve installed your beautiful hardwood floor. Now, let’s keep it looking fabulous for years to come. Here are some maintenance tips:
- Sweep or vacuum regularly to prevent scratches from dirt and debris.
- Use a slightly damp mop for deeper cleaning, but avoid excess water.
- Place felt pads under furniture legs to prevent scratches.
- Use area rugs in high-traffic zones to protect the floor.
- Maintain consistent indoor humidity levels to prevent wood expansion and contraction.
Conclusion
Installing hardwood flooring over concrete might seem like a daunting task, but with the right preparation, tools, and techniques, it’s a project that can transform your space. Remember, patience is key – take your time, follow these steps, and soon you’ll be walking on your very own hardwood masterpiece. So, are you ready to roll up your sleeves and give your home the upgrade it deserves?
FAQs
- How long does it take to install hardwood flooring over concrete?The time can vary depending on the size of the room and your experience level, but generally, you can expect the process to take 2-3 days for an average-sized room.
- Can I install solid hardwood directly on concrete?While it’s possible, it’s not recommended due to moisture concerns. Engineered hardwood is a better choice for concrete subfloors.
- Do I need to remove baseboards before installing hardwood flooring?It’s not absolutely necessary, but removing baseboards can make the installation process easier and give a cleaner finished look.
- How soon can I walk on my newly installed hardwood floor?For glue-down installations, wait at least 24 hours. For floating floors, you can usually walk on them immediately, but it’s best to wait a day before moving furniture back in.
- Can I install hardwood flooring in a basement with a concrete floor?Yes, but extra precautions against moisture are crucial. Always conduct thorough moisture testing and use a high-quality moisture barrier.


0 Comments